Repair guide: UNIT-4 battery

Some components are expected to wear out over UNIT-4’s lifetime - main examples being batteries and speaker drivers. UNIT-4 has been designed to be disassembled with glue-free design by anyone with 2 screwdrivers and AIAIAI’s step by step repair guides. This will make sure your UNIT-4's will stay with you for as long as possible.
TOOLS
All you need is a thin, hard plastic tool or an old credit card and 2 cross head screwdrivers. We use a Phillips 00 and a Phillips 2.
REPLACING THE BATTERY
Remove the front panel
- Make sure UNIT-4 is turned off.
- Use a thin, hard plastic tool or an old credit card and pull off the front panel.
Remove front housing
- Take a screwdriver and remove all 16 screws as shown on the image below.
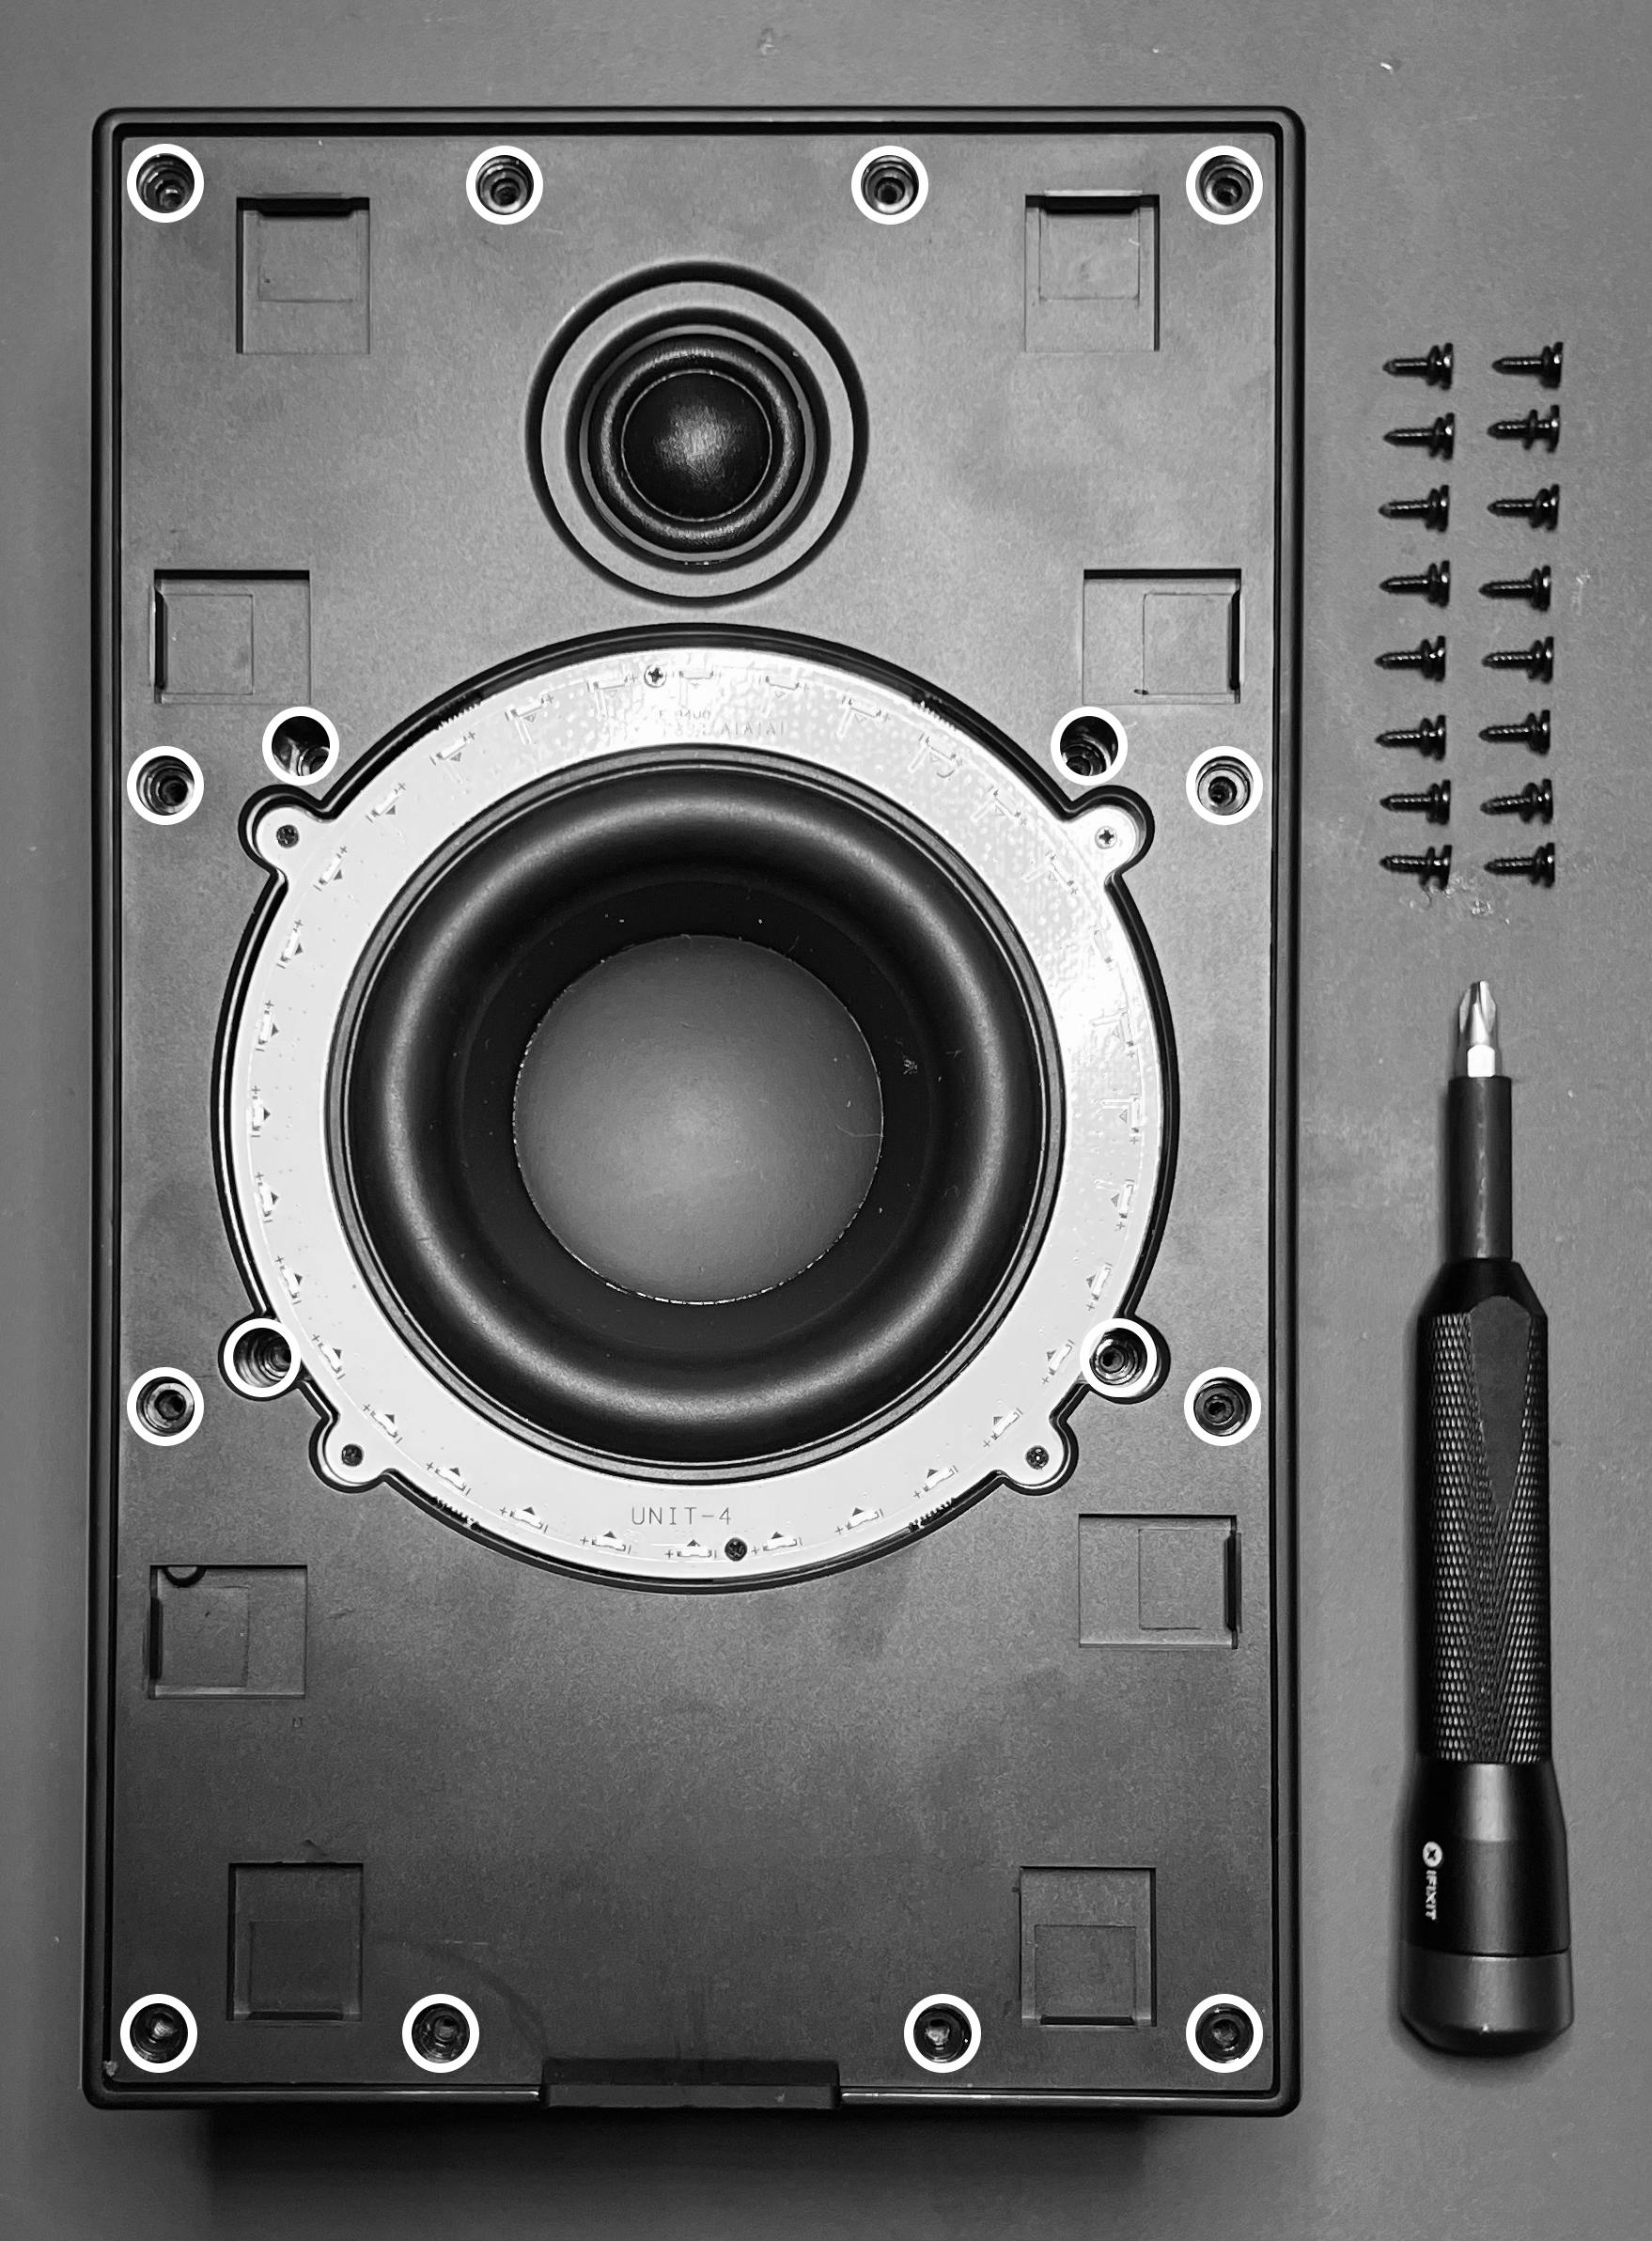
- Place UNIT-4 upright and carefully lean forward while supporting the front.
- If the front housing is too tight, we recommend using a flathead screwdriver or similar to pull the housing out. You can do this by pulling it out by the magnet locks.
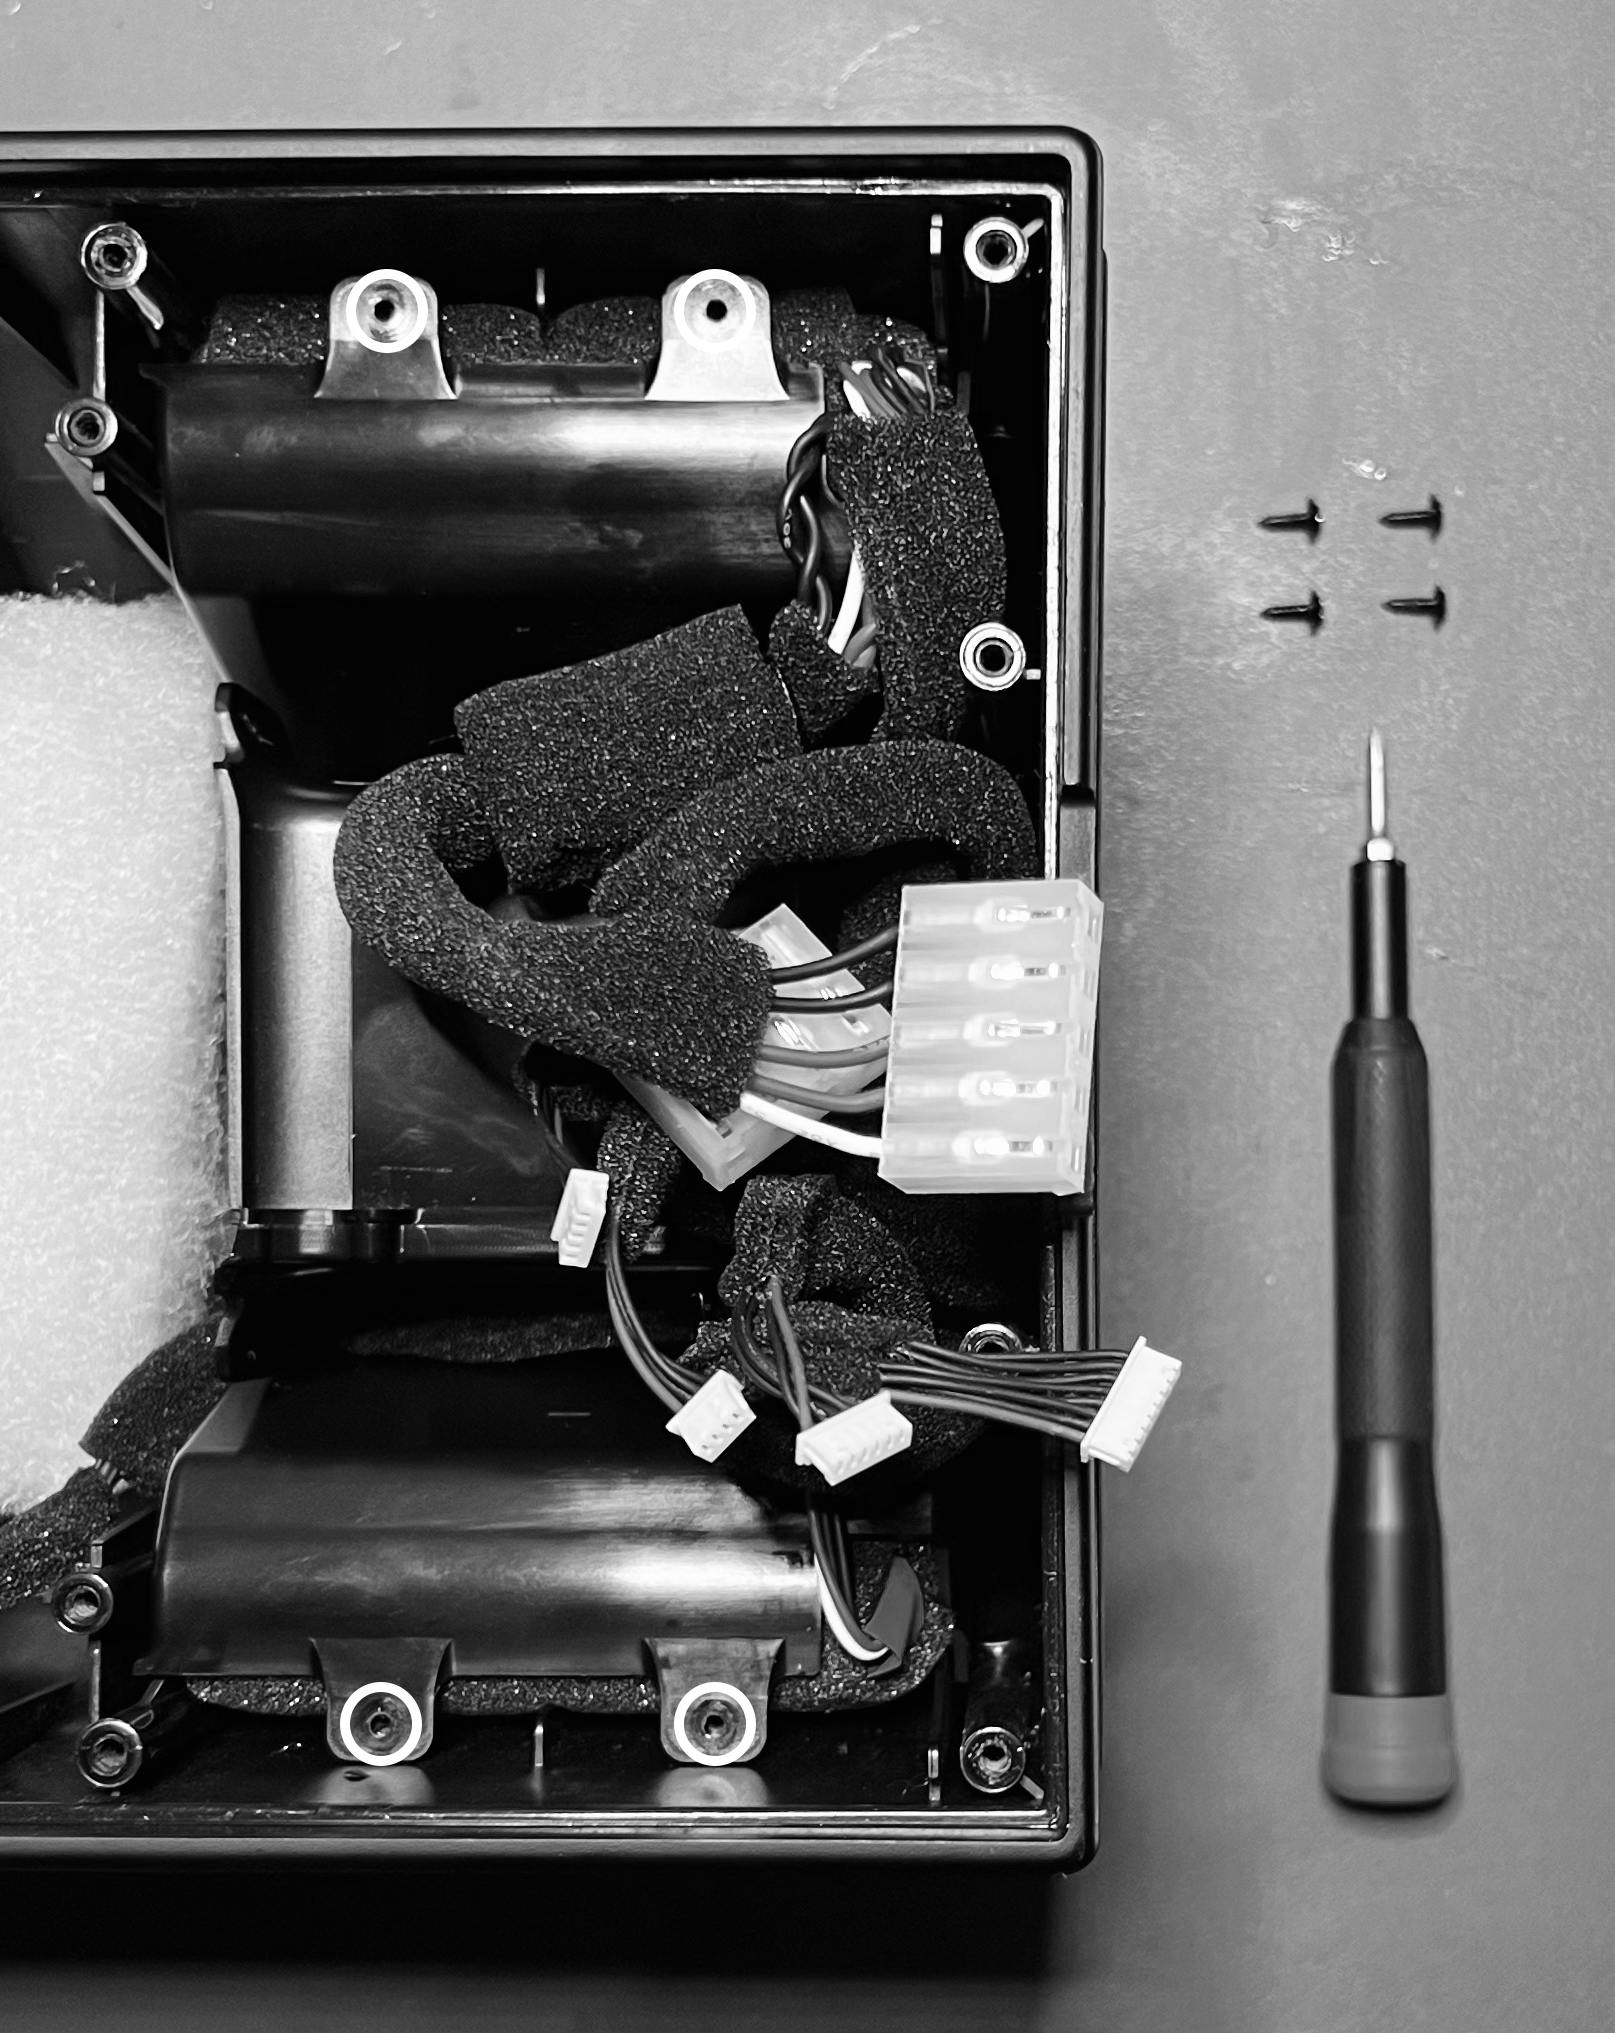
Disconnect back housing cables
- Disconnect the 6 connectors on the back edge of the main circuit board.
Remove battery pack screws and battery packs
- Take a screwdriver and remove the 2 screws from each side.
- Lift out the battery packs.
Install new battery packs
- Slide battery packs in to place. The pack with the connectors is on the right hand side.
- Push the connecting cable underneath the bass vent.
- Hand tighten the 2 screws in each side.
Reconnect the cables
- Reconnect the 6 connectors to the main circuit board.
Fix in front housing
- Carefully tilt up the front housing and push into place.
- Make sure no cables are trapped.
- Add all the 16 screws and hand tighten.
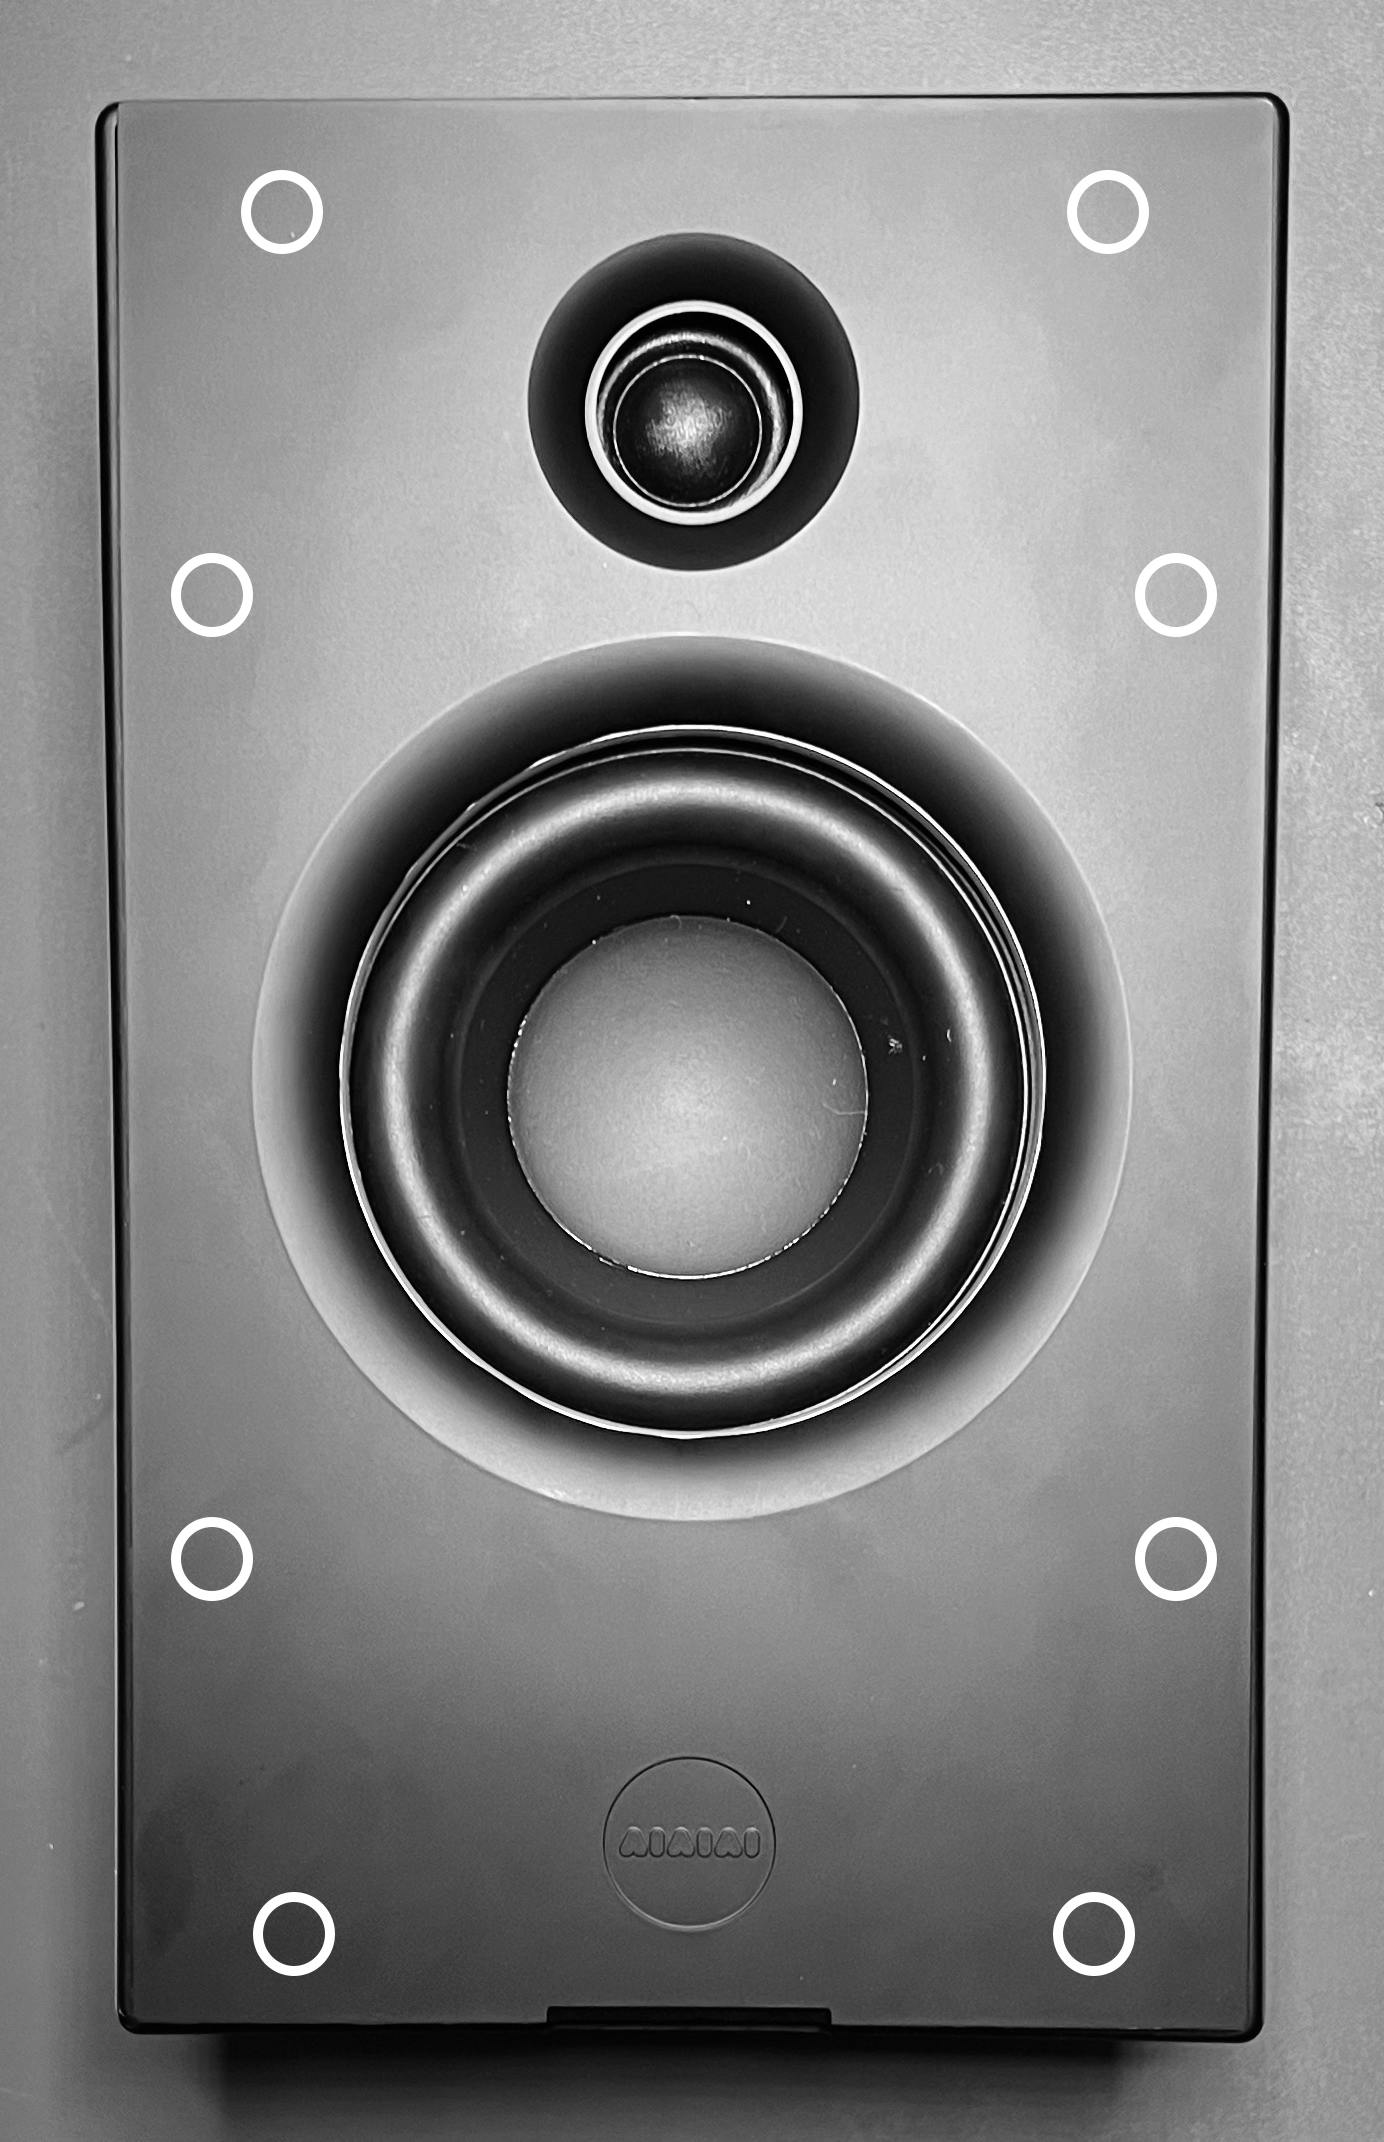
Mount front panel
- Take the front panel and place on top of the front housing.
- Push with 2 thumbs on the 8 points shown below.
Can’t find what you’re looking for?
Stay up to date
Join us online
© 2024 AIAIAI. All Rights Reserved.